Facebook Twitter Instagram
    Trending
    • How to Pack Your Kayak
    • Flush Mounted Rod Holder Install for the Offshore Angler
    • Best Kayak Fishing Crates
    • Benefits of Paddling for Exercise
    • Best Bed Racks for Chevrolet Silverado
    • Perfect the Canoe Forward Stroke
    • Know How to Float, Swim, and Self Rescue in Whitewater
    • How to Throw a Rope Bag In Whitewater to Rescue Paddlers
    Facebook Twitter Instagram
    Kayak Manual
    Subscribe
    Tuesday, March 21
    • Home
      • About
    • Contact
      • Write for Us
    • Privacy Policy
      • Disclaimer
    • Kayak Types
      • Inflatable Kayaks
      • Budget Kayak
      • Folding Kayaks
      • Kayak for Rapids
      • Kayaks for Kids
      • Sit-In Kayaks
      • Sit-On-Top Kayaks
      • Tandem Kayaks
      • Touring Kayaks
    • Blog
    Kayak Manual
    Home » Flush Mounted Rod Holder Install for the Offshore Angler
    kayak

    Flush Mounted Rod Holder Install for the Offshore Angler

    Arthur G. MooreBy Arthur G. MooreMarch 17, 2023Updated:March 17, 2023No Comments3 Mins Read
    Share
    Facebook Twitter LinkedIn Pinterest Email

    Offshore kayak fishing presents challenges that some kayak anglers may not be prepared for. One example is the integrity of a flush mounted rod holder when fishing for large pelagic fish. In some cases a typical install using rivets may not be sufficient enough. When a large fish strikes it can put great stress on the rod holder and  the rod holder can be ripped out causing you to loose the fish.

    In some cases can end up losing expensive equipment if it wasn’t secured with a leash and even worse, you can be left with a large open hole that water can flow into making your kayak unstable and unsafe. Someone suggested that I try a different method of installation using nuts and bolts. The method illustrated below not only provides a more secure installation but also helps solve the issue of not being able to use nut and bolts because of limited interior access.

    Materials Needed:

    • (3) 10/32 stainless steel bolts, 2” long
    • (3) 10/32 nuts with nylon inserts
    • (6) – stainless steel washers
    • Needle Nose Pliers
    • Crescent Wrench
    • Vice Grips
    • Dremmel Tool w/metal cutting and sanding wheel
    • Silicone

    Instructions 

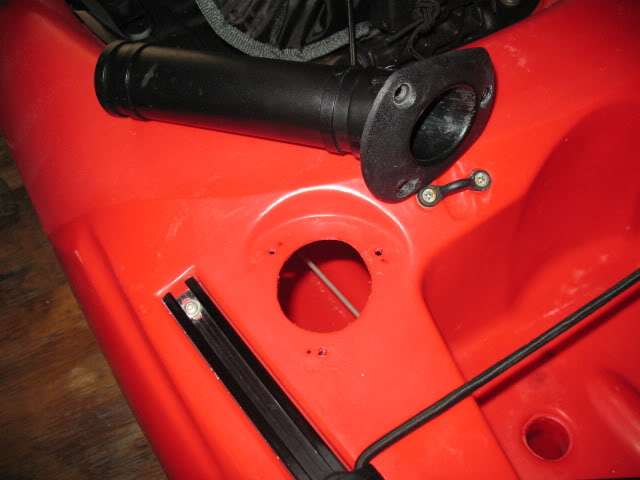
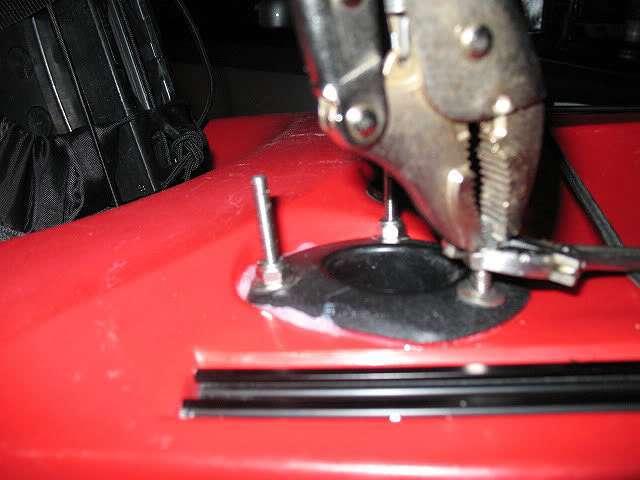
    Step 1: Remove the flush mounted rod holder that is currently installed. If installed with rivets, drill each one out with a drill bit. Using a ¼” drill bit, make the 3 holes on the kayak larger to accommodate the bolts. If you are installing a flush mounted rod holder for the first time, follow the recommended instructions provided by the manufacturer but use a ¼” drill bit to accommodate the 10/32 bolts when drilling the 3 holes.

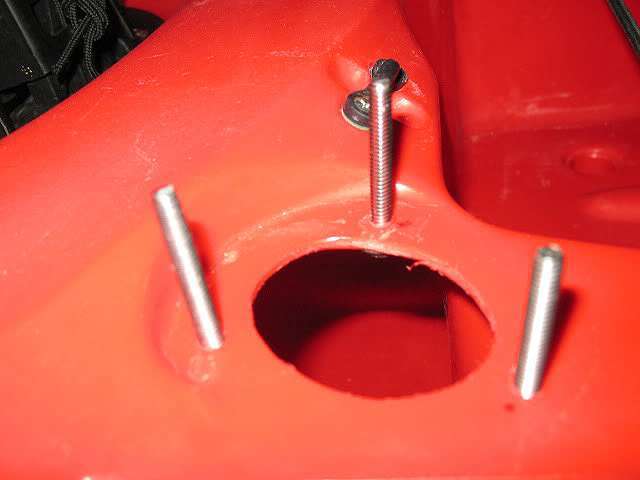
    Step 2: Insert a bolt and washer from the underside of the kayak into each hole. They should fit snug so that they don’t drop when the rod holder is inserted. If they keep dropping into back into the boat, apply a small amount of silicone around each bolt and let dry before you continue.

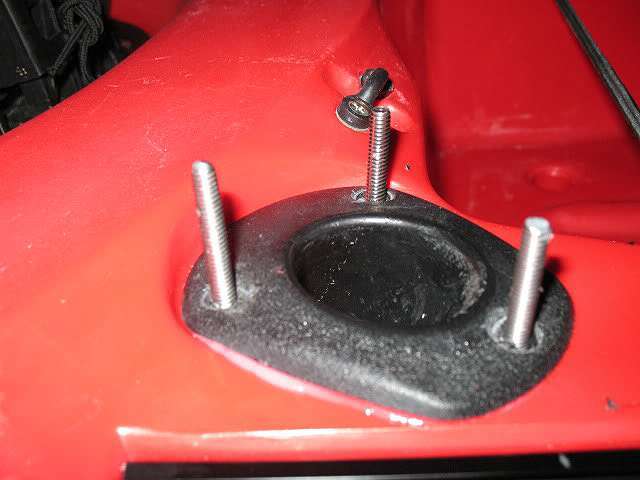
    Step 3: Using the ¼ drill bit, make the 3 holes in the rod holder larger to accommodate the bolts. Add silicone to the bottom side and around each hole on the rod holder and carefully insert it back into the boat. You’ll need to be careful to not let the bolt slip back into the boat. If needed, make the 3 holes on the rod holder a bit larger for easy bolt entry by reinserting the ¼ drill bit into each hole several times. Reapply silicone as needed.

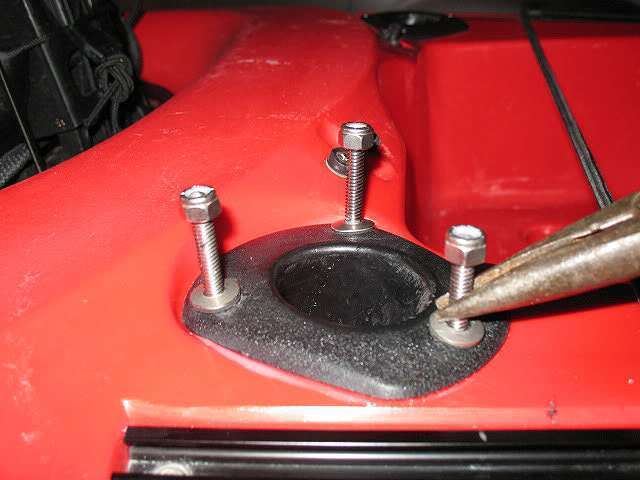
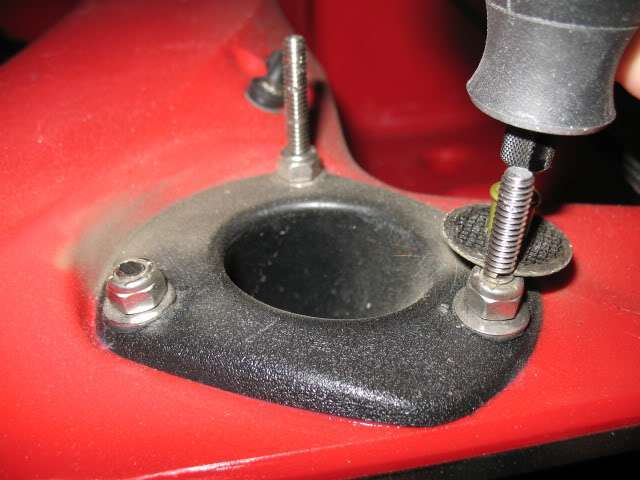
    Step 4: Once the rod holder is in place. Insert a washer and nut on to each bolt; loosely tighten until you have about 1/8″ of the bolt exposed above the nut. It helps if you gently grasp each bolt with a pair of needle nose pliers (as shown) when doing this

    Step 5: Using your vice grips, clamp the top of each bolt and tighten the nuts. Wipe off the excess silicone for a clean finish once all the nuts are tightened.

    Step 6: With the Dremmel tool, cut the remainder of the bolts off just above the nuts. Swap the metal cutter with sanding wheel and grind the top of each bolt for a smooth finish. This will keep you from getting injured by the rough edges left after cutting the bolts.

    Share. Facebook Twitter Pinterest LinkedIn Tumblr Email
    Previous ArticleBest Kayak Fishing Crates
    Next Article How to Pack Your Kayak
    Arthur G. Moore
    • Website

    Arthur G. Moore is a veteran paddler. He has over 10 years of whitewater kayaking experience in his kitty. When he was young, he used to love kayaking in rapid III and rapid IV but as time went on, he decided to concentrate mainly on covering long distances on a standard touring kayak. He is currently working as a senior editor for Kayak Manual.

    Related Posts

    How to Pack Your Kayak

    March 18, 2023
    Read More

    Best Kayak Fishing Crates

    March 15, 2023
    Read More

    Benefits of Paddling for Exercise

    March 15, 2023
    Read More

    Leave A Reply Cancel Reply

    You must be logged in to post a comment.

    AFFILIATE DISCLAIMER

    KayakManual.com is a participant in the Amazon Services LLC Associates Program, an affiliate advertising program designed to provide a means for sites to earn advertising fees by advertising and linking to Amazon.com. As an Amazon Associate, We earn from qualified purchases.

    ABOUT KAYAK MANUAL

    It’s time to ditch the dry dock and get out onto the water! Kayak Manual provides an excellent resource for all aspiring kayakers and canoeists in pursuit of the best – and safest – paddling out there. Whether you’re a complete beginner looking to dip your toes into the waters of kayaking or an experienced expert looking for new places to explore, we’ve got you covered. We provide a comprehensive guide to everything you need to know, from finding the best spots on the lake, what gear to bring along for your journey, safety tips so can cruise without hitting any rocks – and some fun fishing tales to reel in while you’re at it. So hit us up before hittin’ the water – with Kayak Manual as your trusty companion, you can be confident that sailing is smooth sailing!

    About Kayak Manual

    Kayak Manual is trying to help both beginners and seasoned kayakers to have a great time on the water by providing them with the most comprehensive and up-to-date information available about kayaking.

    We hope that this manual will provide you with all of the information that you need to get started kayaking or to improve your existing skills. In addition, we have included many helpful tips and resources that we hope you will find useful.

    Affiliate Disclaimer

    KayakManual.com is a participant in the Amazon Services LLC Associates Program, an affiliate advertising program designed to provide a means for sites to earn advertising fees by advertising and linking to Amazon.com. As an Amazon Associate, We earn from qualified purchases.

    Recent Posts
    • How to Pack Your Kayak
    • Flush Mounted Rod Holder Install for the Offshore Angler
    • Best Kayak Fishing Crates
    • Benefits of Paddling for Exercise
    • Best Bed Racks for Chevrolet Silverado
    • Perfect the Canoe Forward Stroke
    Facebook Twitter Instagram Pinterest
    © 2023 ThemeSphere. Designed by ThemeSphere.

    Type above and press Enter to search. Press Esc to cancel.