
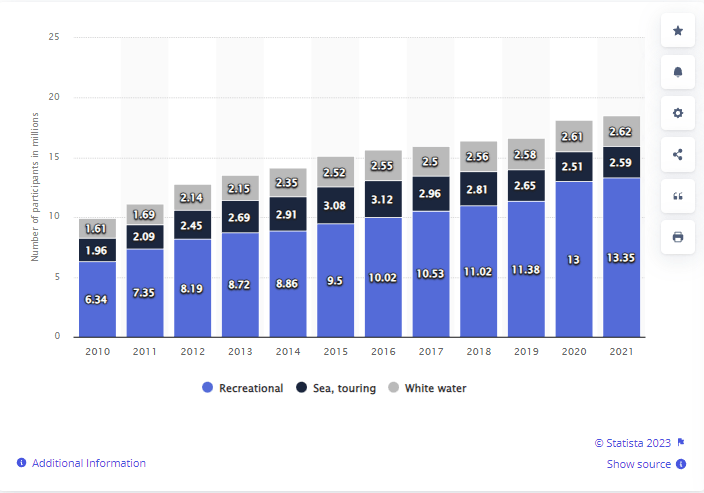
Kayaking, a captivating and diverse sport, has gained substantial popularity over the years. As of 2021, approximately 18.6 million people in the United States alone engaged in this delightful recreational activity, as reported by Statista. On the other hand, the Toyota Corolla, a paragon of compact vehicles, has claimed the title of best-selling car worldwide, with a staggering 44.1 million units sold since its launch in 1966, according to Toyota’s official global sales data in 2020.
However, the fusion of kayaking with the convenience of a Toyota Corolla introduces an intriguing challenge – the proper transportation of the kayak. Given the compact size of the Toyota Corolla, ensuring safe and efficient transport of a typically large and bulky kayak becomes essential. The inadequate or incorrect transportation of a kayak can result in damaging the equipment or, more concerningly, lead to road safety issues.
Understanding the Limitations
The Toyota Corolla is revered for its compactness and efficiency, and while it serves as an excellent urban commuting vehicle, it presents specific restrictions when it comes to transporting a kayak. The compact design translates to lesser roof real estate to accommodate a full-sized kayak, and this limitation demands strategic planning and the right equipment.
When you subtract the weight of passengers and other cargo, the remaining weight allocation for a kayak and its supporting equipment might be relatively limited. It is crucial to ensure that the weight of the kayak, along with all additional gear, does not exceed the car’s maximum payload capacity.
Necessary Equipment
While kayaking can be a blissful and exhilarating experience, hauling the kayak with your Toyota Corolla can bring its unique set of challenges. However, with the right tools and gear, these issues can be conveniently mitigated.
Kayak Roof Rack for Toyota Corolla
First and foremost, the star of the show is the kayak roof rack. This ingenious piece of equipment is explicitly designed to provide a secure and stable platform for the kayak on your Toyota Corolla’s roof. Depending on the make and model, some are more streamlined and offer enhanced features like better padding, quick installation, and improved aerodynamics.
You can expect to spend anywhere from $50 to $250 for a good quality kayak roof rack. The broad price range is due to several factors, including the brand, build quality, extra features, and the type of rack (temporary pad, saddle, J-style, or stacker). Each kind has its merits, and your choice would depend on factors like the kayak size, frequency of your kayaking trips, and budget.
Tie-Down Straps and Foam Blocks
A roof rack alone, however, won’t ensure the secure transportation of your kayak. Tie-down straps are another piece of the puzzle that plays an indispensable role. These straps wrap around your kayak and secure it to the roof rack, keeping it firmly in place, even on bumpy roads or during sudden brakes. Remember, a securely strapped kayak is a non-negotiable safety measure during transport.
Another protective measure to consider is foam blocks. These nifty accessories provide additional support between the car’s roof and the kayak. Their primary purpose is to prevent potential damage to both the car and the kayak. Foam blocks can also add an extra layer of stability, especially if your Corolla does not have a dedicated roof rack installed.
Installing the Kayak Roof Rack
Begin by cautiously unboxing your new roof rack. Here, your anticipation meets practicality as you pull out each component and place it on a flat surface. While the excitement of new equipment may cause a rush, take your time to separate the various pieces – crossbars, feet, clamps, locks, keys, and other additional components your specific rack may have. Familiarize yourself with each part. Understanding what each piece does is the first step towards a successful installation.
Positioning the Roof Rack Feet
Now, the actual installation process begins. Find the designated points on your Toyota Corolla’s roof for the roof rack feet – the manual that came with your rack will provide specific instructions for this. The feet are the connection between the car roof and the roof rack. They bear the brunt of the weight and therefore should be positioned precisely as per the instructions.
Installing the Crossbars
Once the feet are in position, it’s time to attach the crossbars. The crossbars run from one side of your car roof to the other and provide the platform upon which your kayak will rest. Ensure these are parallel to each other and at a right angle to the direction of the car. Their parallel positioning is crucial as it impacts the balance of your kayak during transport.
Securing the Connections
After successfully placing the crossbars, your next task is to secure the connections. This means tightening the bonds between the feet and the crossbars. Depending upon the model of your roof rack, you might need to use tools like a wrench to do this. Make sure they are securely tightened. Any loose connections could compromise the stability of your kayak.
Preliminary Safety Check
Having secured the roof rack, it’s time for a preliminary safety check. Apply a bit of pressure to the rack in different areas to see if it stays put. A well-installed rack should not move, slide, or make any unsettling noises when pressure is applied. It should stand sturdy and robust, ready to support your kayak in all your upcoming adventures. This test serves as a vital safety measure to ensure your rack is correctly installed before placing your kayak on it.
Loading the Kayak onto the Roof Rack
Loading the kayak onto the roof rack is a process that requires careful maneuvering. It’s also an opportunity to appreciate the lightness of your kayak while also understanding its size.
Positioning the Kayak
The first step is to position your kayak parallel to your car, right beside the roof rack. This way, the kayak is ready for a smooth, straight path onto its temporary perch. If your kayak has a pointed and a flat end, make sure the pointed end is towards the front of the car. This is to minimize wind resistance during the drive.
Lifting One End of the Kayak
Next, go to one end of the kayak and lift it onto the rear crossbar of the roof rack. This action requires some strength and is best done by bending your knees and using your legs to lift, rather than your back. Safety comes first, and by lifting with your legs, you can prevent potential back strain.
Pushing the Kayak Onto the Rack
With one end of the kayak on the roof rack, now move to the other end. Here, gradually push it onto the rack, guiding it as it slides along the crossbars until it’s fully on top. During this step, be mindful of your car’s body – a slip of control could lead to unwanted scratches or dents.
Centering the Kayak
Finally, you need to ensure the kayak is placed in the center of the rack for a balanced distribution of weight. It is essential for both the car’s maneuverability and the kayak’s safety. Adjust the position of the kayak as needed, ensuring equal parts of it extend beyond the crossbars on both sides.
Securing the Kayak for Transport
Securing the kayak is crucial to ensure it stays in place during transportation. Failure to properly secure the kayak can lead to potential accidents, property damage, or loss of equipment.
- Take your tie-down straps and loop them over the kayak and under the roof rack bars, creating a secure connection.
- Tighten the straps and check for any movement in the kayak. If it moves, tighten the straps further until it is firmly secured.
- For additional security, use bow and stern lines to tie the kayak’s front and back ends to the car. This reduces the chances of the kayak shifting forward or backward during transport.
Following these steps will help ensure a safe and efficient transportation experience for your kayaking adventure with your Toyota Corolla.
General Tips and Warnings
When transporting a kayak on a Toyota Corolla, there are a few key points to keep in mind:
- Do check the roof rack and straps for any signs of wear or damage before each use.
- Don’t overload the rack by trying to transport more than one kayak if it’s not designed for it.
- Do double-check your setup after a few miles of driving to ensure everything is still secure.
- Don’t speed while transporting a kayak, as higher speeds can lead to instability or damage.
Conclusion
Transporting a kayak on a Toyota Corolla might seem challenging at first, but with the right equipment and a careful approach, it becomes a manageable and rewarding task. The joy of paddling your kayak in serene waters is well worth the effort of safe and secure transportation. Always remember to check and double-check your setup, and here’s to many safe and enjoyable kayaking adventures!